Week 6 Blog Challenge

Hi guys! Today we will be talking about emojis!!!! 🙂

I really like using emojis when I text my friends. They give more emotions to the things I say. Lots of people say that things you say on text can be interpreted differently, but using emojis helps get your emotions across easily! Instead of awkwardly saying that your happy, you can use an emoji to show that you are content. 🙂

Today I have made an emoji to represent myself! It looks like this:

This emoji represents me because I have a light skin color, black hair, and black eyes. I really like to draw as well, which is why I have an art palette in my hand and artistic hat on my head. I like expressing my emotions with hearts and kissy-faces. I love giving love to my family and friends! I have many great great friends and I love them a lot! <3

I made this picture using Code Emoji Project!

Try making your own emoji with the link above! Show me what yours looks like in the comments section!


Week 5 Blog Challenge

Hi! Welcome back!~ o(* ̄▽ ̄*)ブ

For the 6th week’s blog challenge, we are required to blog something about music. I decided to do the playlist option. I created a playlist on YouTube to share with you guys!

Please keep in mind these are my song preferences. They might not suit yours!

Click here to see my playlist!


The first song is “2002” by Anne Marie. I like this song because it’s refreshing and the chorus sounds really nice.

The second song is “Run Free” by Deep Chills feat. IVIE. This song is nice because its great to sing along and has a nice break. I like the beats and the background music too.

Next, there is “Without Me” by Halsey. I love this song. It’s so cool and the beat is strong. The lyrics are very meaningful and the song tells a story. This song is so sad but refreshing, and it’s a really nice song to dance to.

“Little do You Know” by Alex and Sierra is a strong song with lyrics that tell a sad tale. I really like the tune and the sadness in the song.

“Dumb Litty” by Kard is such a cool song. I really like jamming to this song in the car! It’s so upbeat and carefree!

Next is “Wave” by Ateez. This song is calm and smooth. I like the flow that it gives me. The song is like a wave, refreshing and slow.

“Flash” by X1 is such a groovy song. I like learning dances to kpop songs! Then, I can dance along! It’s really cool and I recommend it a lot!

“不仅仅是喜欢” or “Not just Like”, is a Chinese song. I am Chinese myself, so I also like listening to  Chinese songs. This song is more simple and not much background music. I like it a lot, though!

“来自天堂的魔” by G.E.M. is a really popular song in China. The artist, G.E.M., creates really nice songs. Her songs are of many different genres.

“失明飞行” is a song I like to listen to when going to the school in the morning. It’s really calm and the lyrics are slightly unclear, which makes it really nice to listen to.

“光年之外” is another song by G.E.M. She creates so many songs and I love them so much. This song is based on a movie, “Passenger”.

“芒种” is actually a computer generated song. These types of songs are popular in China. It’s really cool how people use computers to make songs that sound like an actual person is singing it!

“Boy with Luv”, by BTS is probably a song that many people know. BTS is a really popular korean pop group. I love this group so much and their comebacks are amazing!!

“Devil” by CLC is a song I was introduced to a few days ago. The song gives a nice vibe and the dance is very cool!

And there we have it! My whole playlist! I hope you guys enjoyed the songs that I grouped together! Maybe later on, I will add more songs to it! What type of songs do you guys like? Please tell me in the comments!


daddy            kattie          aaron

Drawing A Nice, Calming, Fall Scene

Hey guys!

Today I will be teaching you guys how to draw a fall background. I really like backgrounds because they are calming to the mind and are very pretty. In the scene we are drawing today, we are focusing on a tree and falling leaves around it.

In this tutorial, you will need these items:

If you are working on paper: Paper, pencil, black outline pen, colors (watercolor, crayons, colored pencil) Markers aren’t preferred!

If you are working on the computer, you can use any drawing app. I used Sketchbook. It is free and works well.

First, we draw the outline of the tree. You can use a pencil or a light tool on the computer app. In Sketchbook, I used the Paintbrush tool. You can use images on the internet for templates. This is what my tree outline looks like:

Your tree can look however you want it to look. It can be big, thin, or medium. It can have long roots reaching in and out of the ground, too. I made mine slightly thinner and more branches.

Next, we outline the tree to make it stand out more. I used the Ballpoint pen on the computer. On paper, you can use a regular black pen or ballpoint pen. After outlining, it should look cleaner and neater. You can erase the pencil markings, too.
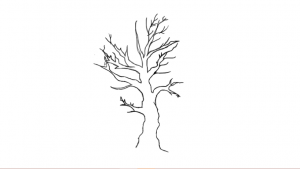
Next we can draw the leaves. First, we draw a sketch of the outline of the tree leaves. Like this:
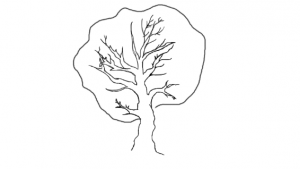
This is just for a clearer image of the amount of leaves you want on your tree. If you don’t want to, it is optional.

Then, we can draw some extra small branches onto larger branches of the tree. This is to make it look like there will be more leaves attached to the smaller branches. Make sure you draw it in another layer or in erasable pencil.

Since we have such a big tree, we wouldn’t want to draw each leaf one by one. That would just be a waste of time. So, we can draw scribbles with our pencils or paintbrush tool. For the paintbrush tool, set the settings to 0.3. You should sharpen your pencil until it is sharp and thin.
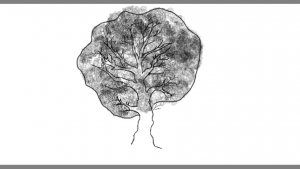
Next, we can erase the background outline for the leaves.
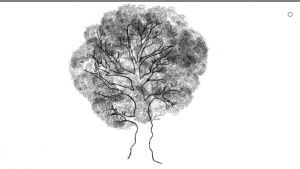
After that, we can start drawing the bark on the tree. On paper, You can just make dotted lines. Some can be shorter, some can be longer. On the computer, you can use the pencil tool to make the lines and dots. Make sure that there is a balance of short and long dots and lines!
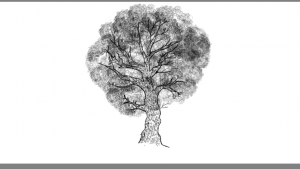
Next, we can start with the ground. We can use the airbrush tool to make an outline of where the grass is going to start and end. On paper, you can make a light line with pencil to erase later.
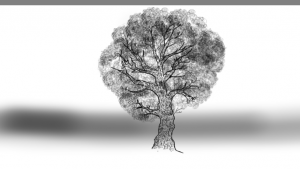
Then, we can add dots to represent the grass. On the computer, you can duplicate the dots once you make enough of them. I used the chisel tip pen. On paper, Your stuck with dotting along the whole bottom paper with pen ._. Make sure you don’t dot on the bark of the tree.

Then, we can erase the line we made to guide you along when you make the grass.

Now, We can start adding color! We do this to the grass first. the top should be lighter, while the bottom should have a darker tint. On Sketchbook, I used the airbrush tool. On paper, you should use colored pencil or watercolor.
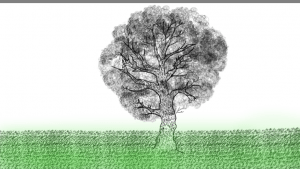
For the sky, we can use a sky blue color. Darker on the bottom, lighter on the top, just like the grass.

Then, we can add orange and red to the leaves. You should mix the colors together and make a nice combination of orange-red:

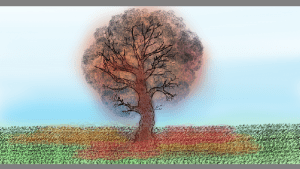
Finally we can, add some leaves to the floor. You can use scribbles, and you can also add leaves falling from the trees. If you want leaves drifting down, here are some leaf templates:
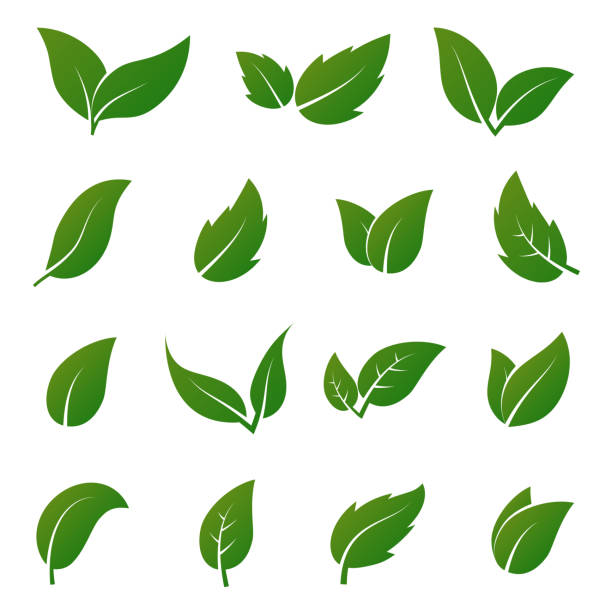
Image result for leaf


I really like these leaves because they are simple and pretty.

When you have your leaves, you can add color to them and add more to the ground. Then you have your final piece of art!
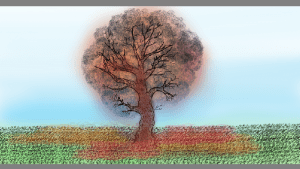
What did your masterpiece look like? Share with me in the comments below!